
 deutsch
share on Facebook
share on Twitter
share on Facebook
share on Twitter
Beginner’s Guide: Which basic settings should I make?
May 1, 2018
After installing WordPress, every beginner must first learn what basic settings should be made.
To adjust the settings in WordPress, log into your website and click on Settings in the backend menu on the left.
In this article we deal with the most important settings that should be made.
1. Settings > General Settings

The first two changes are explained quite simply, your website needs a title and subtitle.
The page title is one of the most important SEO measures on the website. Write something meaningful about what your website is about.
The next points check only briefly, because these were already defined by you during the installation of WordPress: URL and e-mail, as well as the language of your website.
Now check the time zone, date and time. If necessary, make changes here if something is not right.
These settings are important later if you want to plan posts.
The planning of contributions is a good function to create contributions already in the apron and to publish afterwards on a certain day to a certain time.
That was it already in the general settings. Do not forget to save.
2. Settings > Writing Settings

These settings can be neglected as far as possible.
We will only briefly explain their functions:
- The default category allows you to define if you forgot to select a category when posting a post, to which category such a post should be assigned.
- Right below you can select a default template for posts. However, this can also be selected in each post.
- If you are on the road a lot, you can simply send your contributions by e-mail to your WordPress with the setting "Write via e-mail". You can read here exactly how this works.
- The last setting option here is the update service. When you publish an article, WordPress can inform various services about it. Today, hardly anyone uses this service anymore.
3. Settings > Reading Settings

Here you decide whether the start page should show your posts or a static page.
At the beginning it is probably sufficient to show only your last blog posts.
If you have a lot of content on your website at some point, it is advisable to create a landing page for it so that your content can be structured better.
If you have already bought a premium theme, it is possible that this theme already has a static landing page integrated and overwrites this setting.
For a normal bow, not many settings have to be made here.
Only the articles should be changed to short version in the RSS feed.
Why you should present your contributions in the RSS feed as a short version:
- You don't get anything out of it if your readers just read all your posts in the RSS feed. The RSS feed is not as customizable as your website, so you will be disadvantaged in the marketing of your website.
- Other websites can read out your contributions completely via the RSS feed and display them on their own website. This is done to earn money with foreign content. It is not uncommon that such websites with your content are listed in the search engines before you. Protect your content and never publish complete articles in the RSS feed.
How many articles you want to have displayed on your website or in the RSS feed can be defined here. The default setting can be left here at the values.
The setting "Search Engine Visibility" is often activated if the website is still under construction.
Only remember when your website is ready to allow visibility to search engines again.
4. Settings > Discussion Settings

This is especially interesting if you want to allow comments on your website.
If this is not the case, simply switch off the comment function here. Deactivate the third checkbox.
However, if you want to allow your visitors to comment, there are a few things to consider:
- The first two checkboxes should be activated to enable a search engine friendly network.
- The e-mail function, if someone writes a comment or waits for activation, can either be activated or deactivated. Whichever you prefer. Since we work with our websites on a daily basis anyway, we have deactivated the e-mail function. If you do not administrate your website on a daily basis, it may be a good idea to be informed by e-mail.
- Before a comment appears, the author must already have written an approved comment, can be activated. But it is also not wrong to activate the checkbox that every comment must be approved. It is never wrong to know what content is published on your website, after all, you are also liable as a website operator.
- In any case, set up a spam protection. These are for example captcha which are necessary before entering comments or also generally the free plugin Akismet.
5. Settings > Media Settings
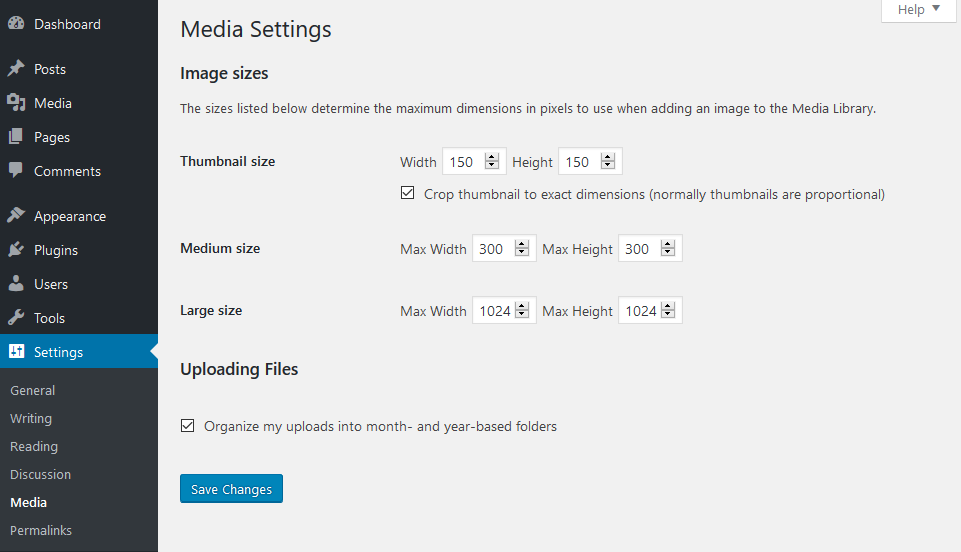
In 99 percent of the cases, nothing has to be set here.
WordPress specifies a standard that the theme used may adapt or supplement.
Attention: If you make changes here, these will only be taken into account for the images uploaded in the future.
6. Settings > Permalink Settings
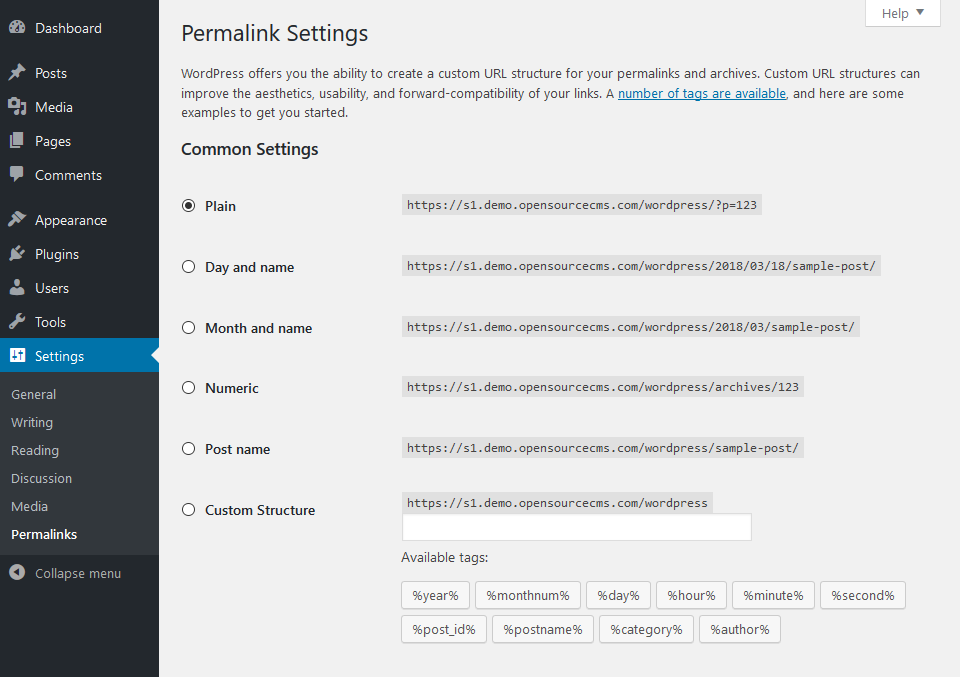
When we talk about permalinks, we mean the URLs of your subpages.
With the adaptation of the permalink structure the search engine optimization of your website starts.
Talking permalinks are not only beneficial for your visitors, but also for search engines to better understand your content.
Recommendation: Make sure to change the default setting from "Simple" to "Post name".
For further information we recommend our beginners guide, where you will find a lot of useful information about WordPress.
If you liked this post, please subscribe us on Facebook and Twitter.

Andrea Behrens
Has many years of experience with Wordpress-based customer projects. He is passionate about the continuous development of WordPress.
Related Posts


Comments
Write a comment
registered as . Log out?
Create a free account to post a comment
I already have an account, log me in